Building an IT Home-Lab Network | Part 5: Adding an Access Point (**DRAFT**)
Table of Contents
Previously: Building an IT Home-Lab Network | Part 4: Cisco SG500 switch configuration
Time to set up wireless connectivity with our AP (DRAFT)
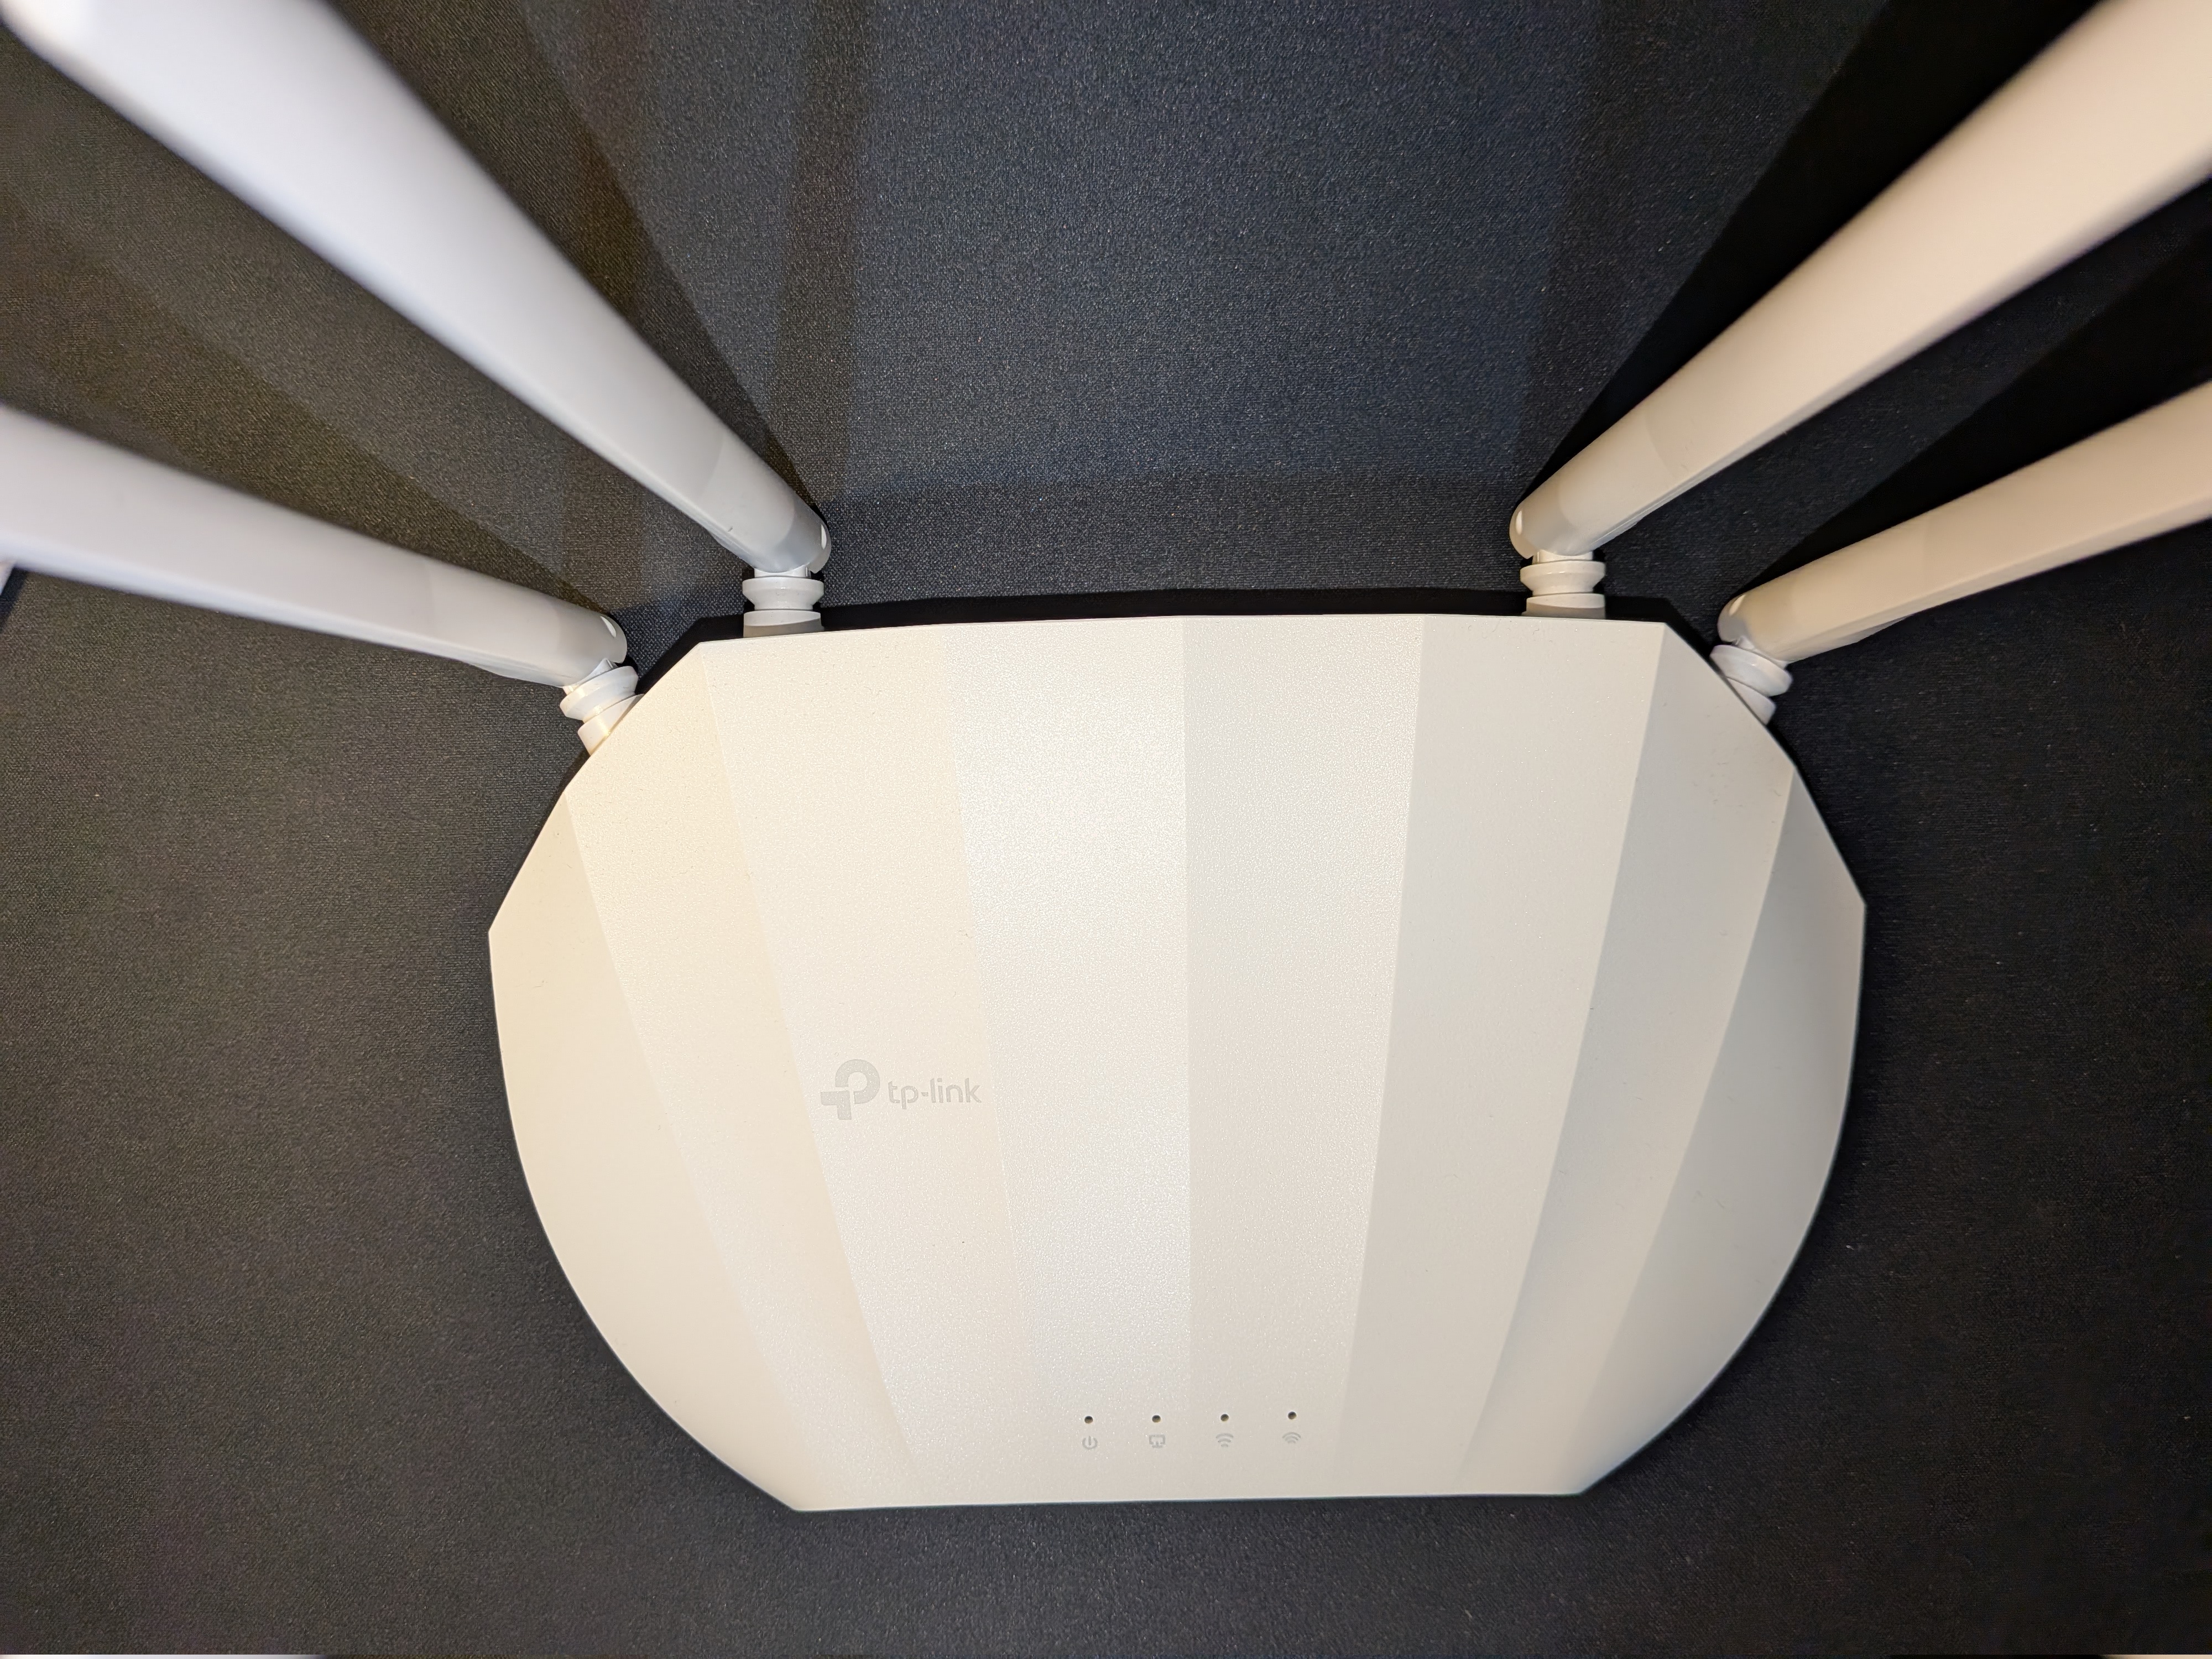
Hardware Used
Here is what I am working with: a TP-Link WA1801.
It’s an alright AP but it lacks some more advanced features that would be useful.
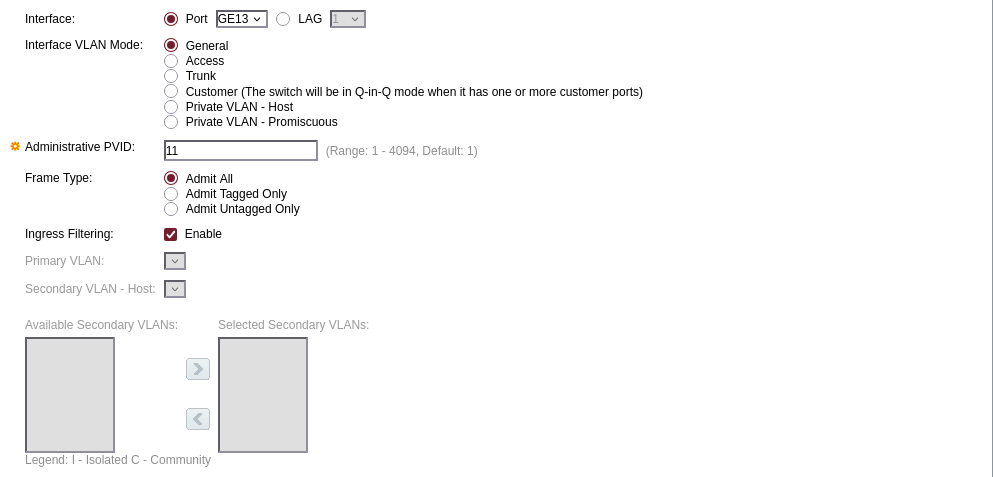
Switch Configuration
To access it we will plug it into port 13 of our switch and set up the port as follows:
- Keep it as an Access Port
- Change the VLAN to
11

Checking DHCP Leases
Let’s take a look at pfSense under
Status --> DHCP Leases:
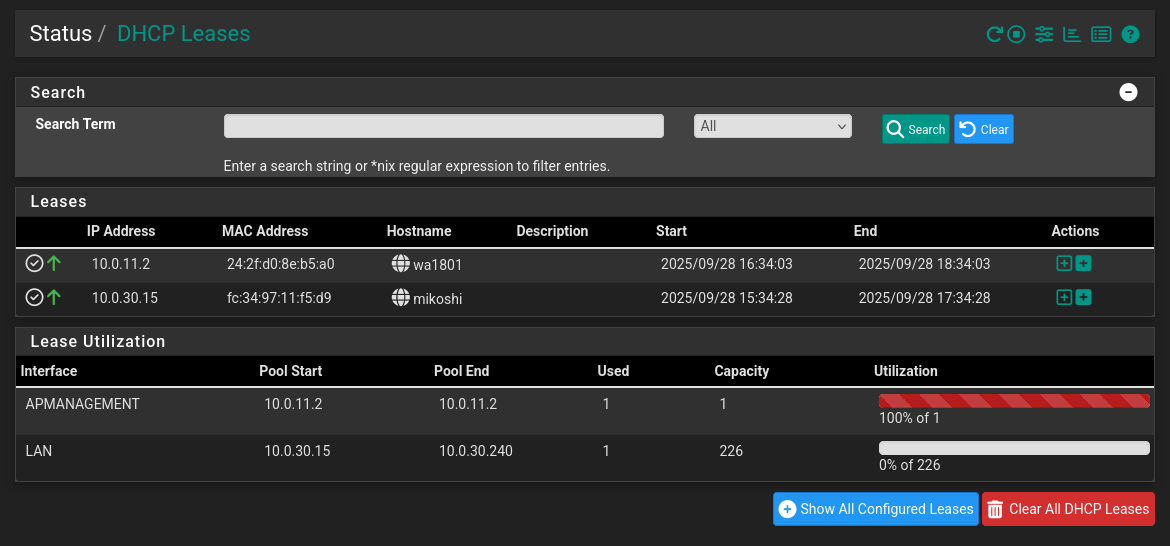
Here it is!
Let’s try for a web interface.
Initial Setup
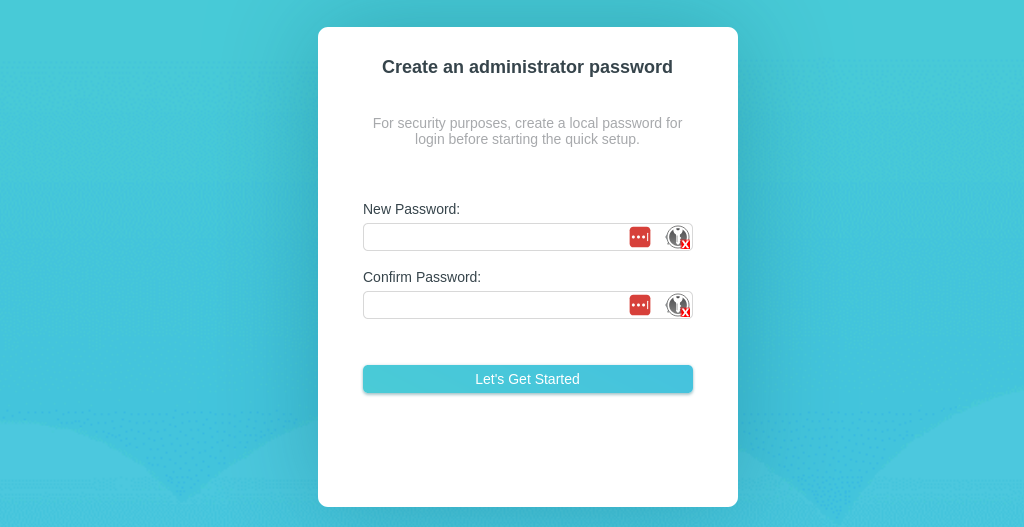
What follows is a simple initial setup.
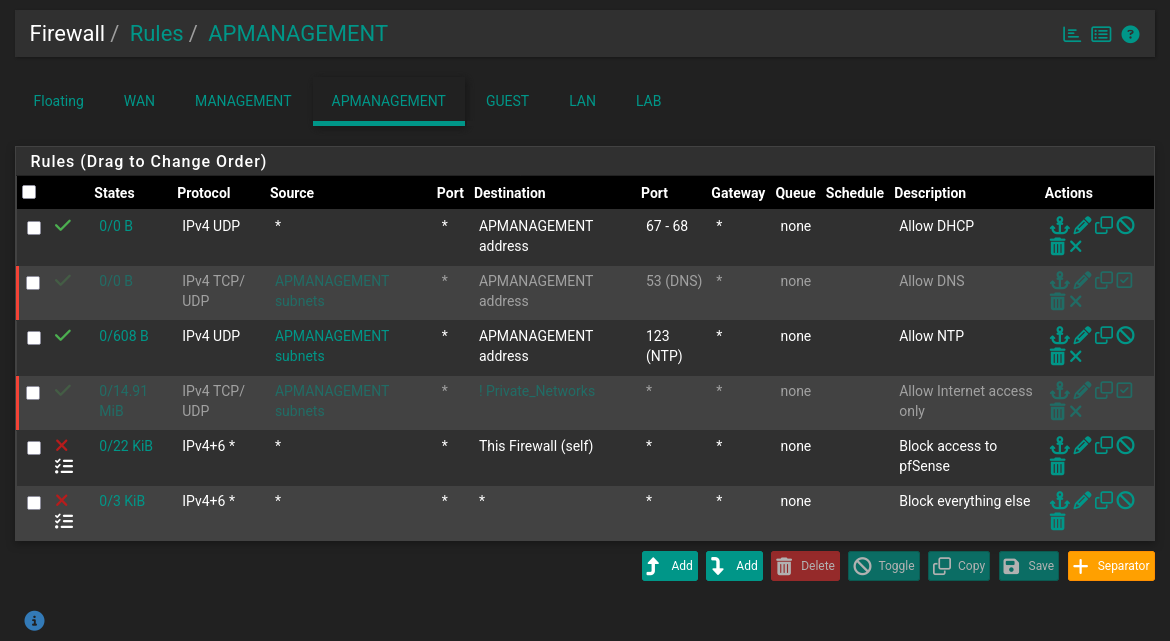
Now let’s head back to pfSense rules real quick and allow the AP to:
- Access the internet
- Utilize the DNS protocol
- Reach our NTP server
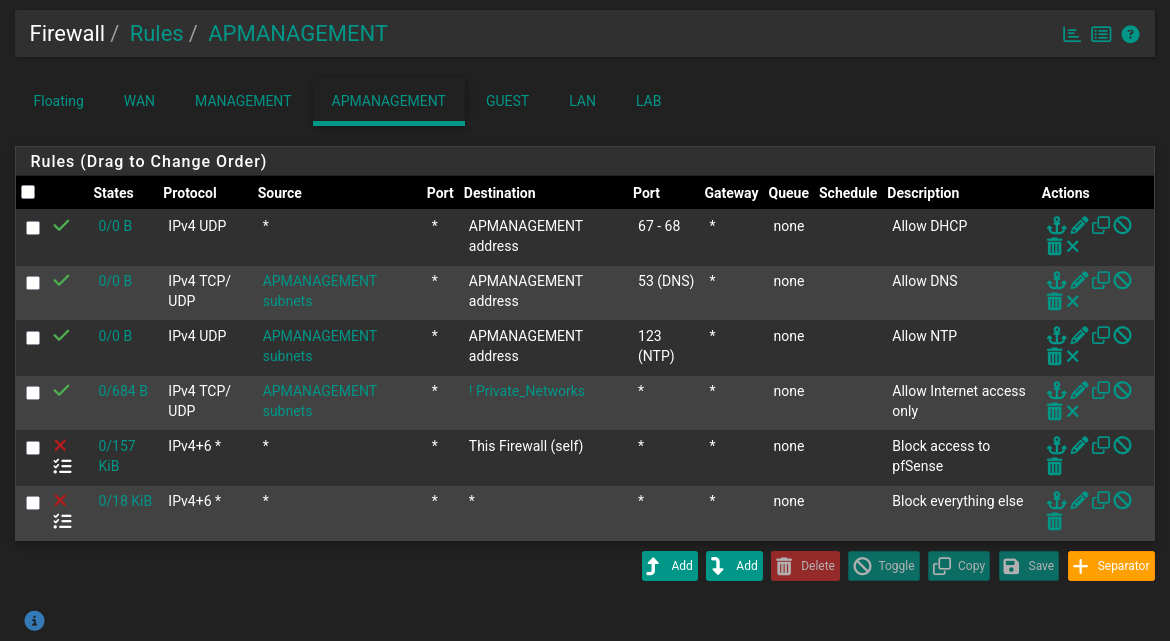
This way we can check for any updates the easy way.
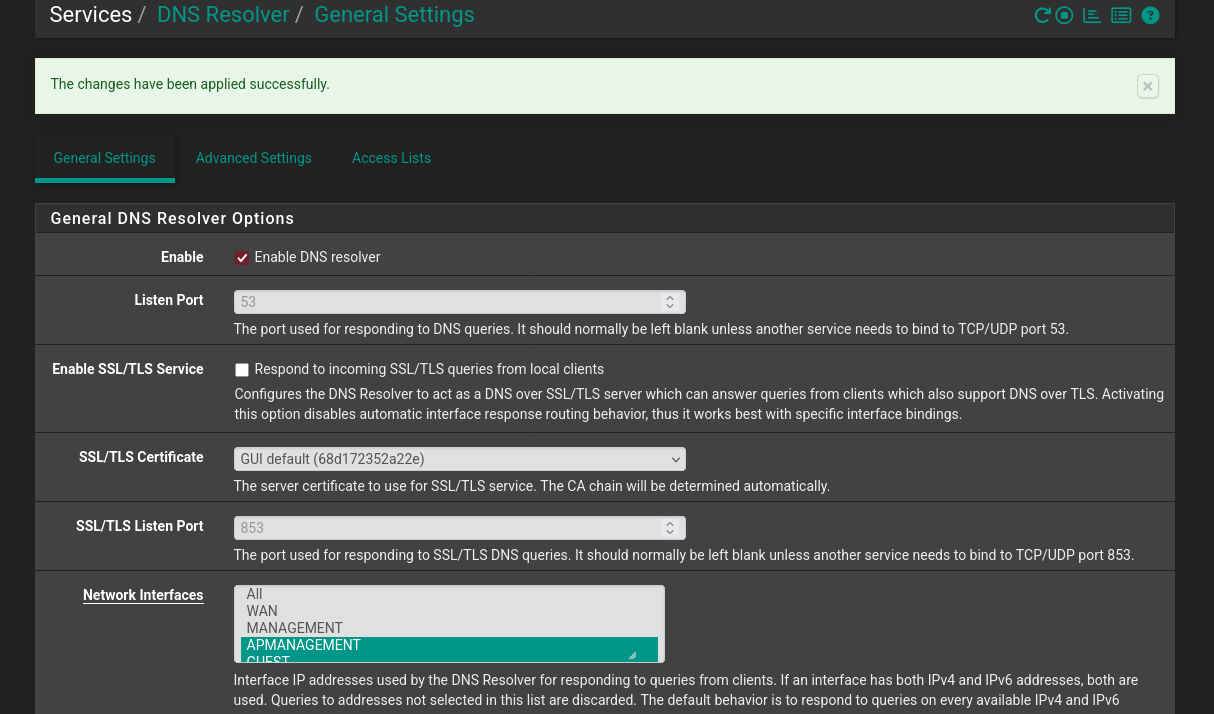
I will also have to mark the APManagement interface under DNS Resolver settings.
Because I set the interfaces explicitly.
Updating Firmware
With auto-update checked we now get this popup, so let’s update the firmware.
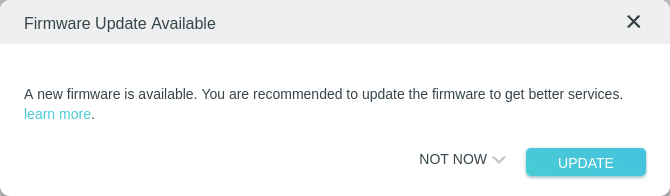
After some time and a reboot we are now up to date!

Switching to SSID Mode
First let’s switch to SSID mode and reboot to apply.
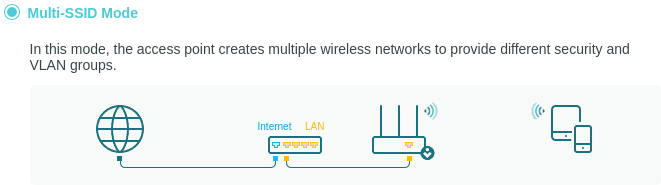
We are asked to set up some things again from scratch, so let’s do that.
Configuration Summary
Settings to apply:
| Setting | Description |
|---|---|
| Local Management | via HTTPS |
| Time | Get time from our NTP server |
| SSIDs | Separate for Guest, LAN, and Lab networks |
| Security | WPA3 Personal / WPA2 PSK |
| Hidden SSIDs | Enabled (for decluttering) |
| Channel | Widest available |
| Frequency | Configure both 2.4 GHz and 5 GHz |
pfSense Rules
Great, now let’s revert pfSense back to our original settings.
I will keep the rules as disabled for easy re-enabling in the future.
SwitchPort Tweaks (SG500)
Now let’s tweak the port settings on the SG500:
- Change the Interface VLAN Mode to General.
- Add our SSID-related VLANs to the allowed list.

VLAN Isolation Overview
As you can see more clearly now, with this setup we can isolate the management interface to its own VLAN, even though it’s sent untagged by the AP.
I could make it tag natively with the management VLAN (
10),
but the more secure approach is not to allow untagged access to VLAN 10.
Testing Connectivity
All we need to do is test with some wireless device.
Here is my phone connected to the SSID corresponding to the LAN network (VLAN 30).
You can see it successfully gets an IP address from the DHCP server (pfSense) in the network as we have defined it and has internet connectivity.

It seems to be working well!
Next part, coming soon: Setting up VoIP end-to-end