Building an IT Home-Lab Network | Part 2: Configuring the Cisco C887VA as a VDSL modem
Table of Contents
Previously: Building an IT Home-Lab Network | Part 1: ISP configuration parameters
The goal
Alright, time to get our C887VA behaving like a plain modem. The goal here is: no IPs, no services, strictly Layer 2 and as dumb as possible.


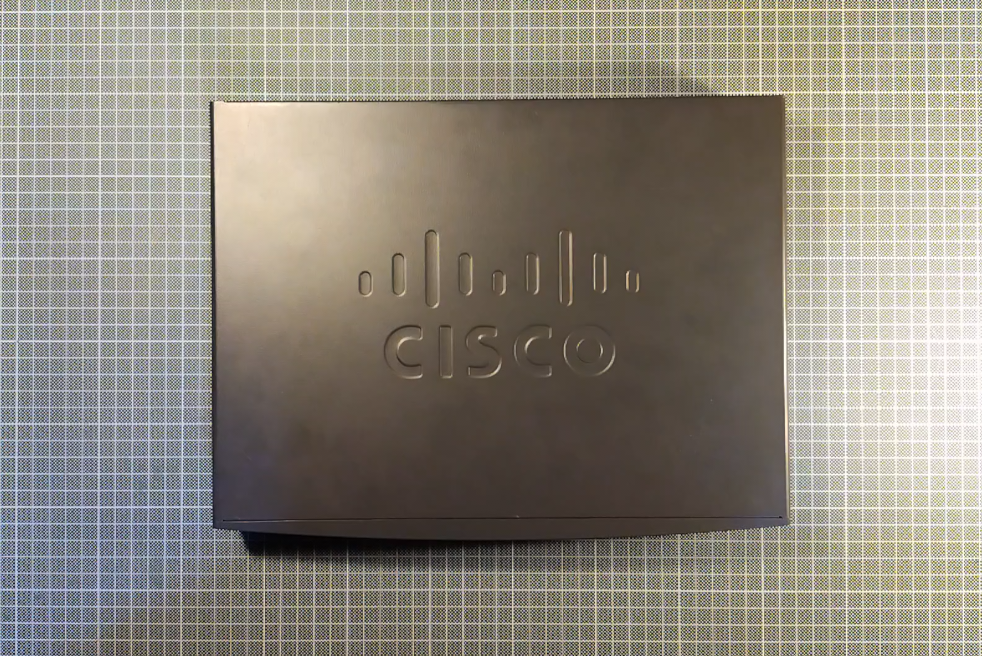
If you’re curious, here’s what it looks like inside:

See that CMOS battery? Yeah, I saw it too and instantly wanted to replace it. Surprisingly, it was a pain to get out, almost like Cisco really didn’t want us messing with it.
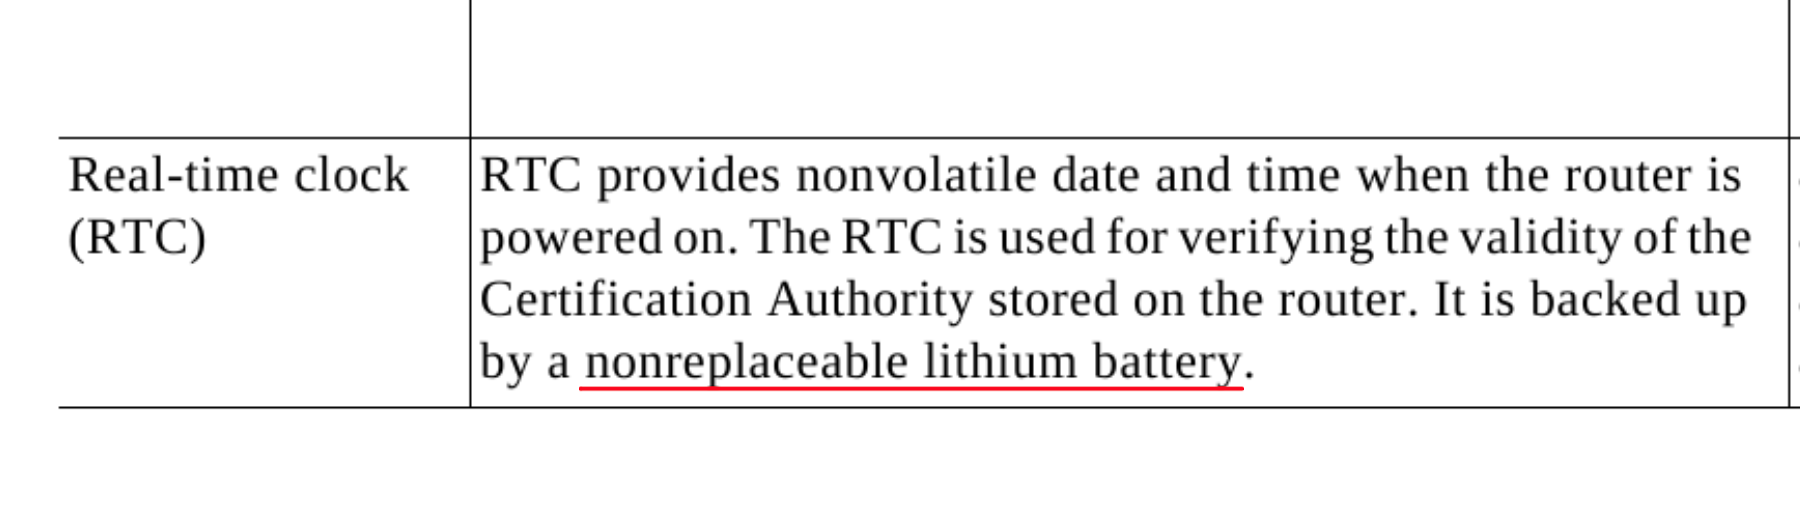
Turns out, they kind of don’t!

Thankfully, after a couple of reboots the error cleared and the replacement stuck.
Why it’s a little tricky
From our initial research we know that we need to set up a VDSL link between the modem and the ISP DSLAM.
Our device has a VDSL controller and it works with the ETH0 interface.
We also know that the ISP tags traffic (802.1q) like this:
- 835: Internet Traffic
- 836: IPTV
- 837: VoIP
So we’ll create three subinterfaces accordingly.
The tricky part is how to pass those VLANs downstream.
Here’s the concept in diagram form:
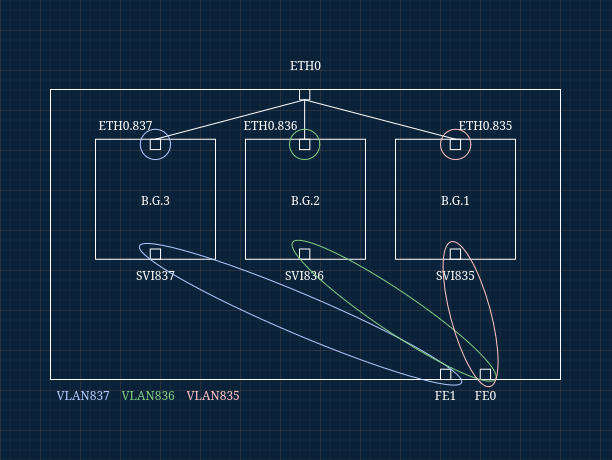
What’s Going On?
The C887VA’s FastEthernet(FE) ports (four total, two shown above) act only as switchports. That means no subinterfaces and no direct bridging between switchports and routed interfaces. Passing VLANs isn’t straightforward.
The workaround is to create three SVIs, one per VLAN.
Here’s how it works in the south –> north direction:
- VLAN-tagged traffic hits a switchport.
- It gets switched into the matching SVI.
- Since the SVI is part of a bridge group, it forwards traffic to the corresponding
0.Xsubinterface.
And the reverse flow works the same way. Normally this wouldn’t happen, but adding the SVIs into bridge groups effectively gives them switchport-like behavior.
Console setup
Let’s get started!
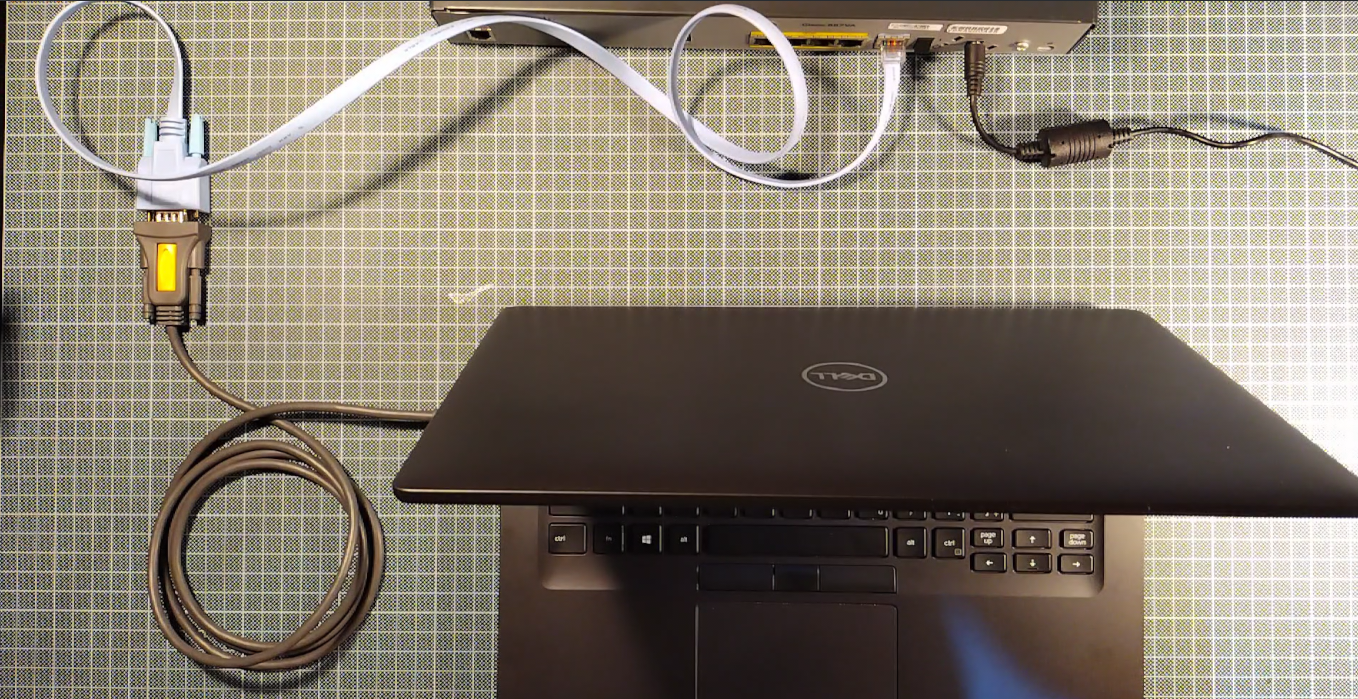
In classic Cisco fashion, the first stop is a console cable. I’m using the common RS232-to-RJ45 rollover cable plus a USB-to-serial adapter.
Plenty of other solutions exist, but fair warning: console access can be finicky and not all adapters play nice.
Talking to the console
For terminal emulation, I really like picocom:
As its name suggests, picocom is a minimal dumb-terminal emulation program. It is, in principle, very much like minicom, only it’s “pico” instead of “mini”!
My workflow
-
Plug in the USB adapter and check which device path it shows up as:
ls /dev/ttyUSB*Typical output:
/dev/ttyUSB0 -
Use Cisco’s default console settings:
- 9600 baud
- 8 data bits
- 1 stop bit
- No parity
- No flow control
With picocom and
TTYUSB0that becomes:sudo picocom -b 9600 -d 8 -p 1 -y n -f n /dev/ttyUSB0
If this is your first boot after a reset, you’ll hit the initial setup dialog. Skip it, it’s easier to configure everything manually.
Checking versions
With hostname set to Modem.
For IOS and ROMMON versions:
Modem>enable
Modem#show version
Important note, take a look at what value you get for: Configuration Register. I’ve had some issues with the value being: 0x2142 and my configuration wouldn’t gent applied.
For the VDSL controller firmware:
Modem#show controllers VDSL
You can cross-check against Cisco’s software page to see where you are sitting at. Even with the device being EOL, unfortunately downloads are locked behind contracts.
If you happen to randomly stumble on updated images (IOS/ROMMON/VDSL firmware) in your old backup archives, like I did, always verify them with Cisco’s official MD5 or SHA512 checksums before flashing.
I like to use md5sum and sha512sum on Linux for situations like these.
Example usage:
echo "hash_value  image_file_name.bin" > file_name.md5
md5sum -c file_name.md5
And you can do the exact same thing with
sha512sum
Updating over FTP
After verifying the images here are the steps I used to update over FTP.
First we will need a layer 3 interface to facilitate the FTP transfer.
Modem>enable
Modem#configure terminal
Modem(config)#int vlan 1
Modem(config-if)#ip address 10.0.0.2 255.255.255.0
Modem(config-if)#no shutdown
Next let’s configure a switchport for connecting.
Modem(config-if)#interface FastEthernet 0
Modem(config-if)#switchport mode access
Modem(config-if)#switchport access vlan 1
Modem(config-if)#no shutdown
Now we can connect a PC via FastEthernet 0 but we will need to manually set up an IP address for our PC’s interface.
I like to use iproute2 for situations like these.
First use ip a to check the interface name.
ip a
Next add an appropriate IP address like this:
sudo ip address add 10.0.0.1/24 dev eno2
Now pinging 10.0.0.2 should work!
Note: When you’re assigning IPs manually and don’t have internet access, NetworkManager might start throwing little “disconnected” pop-ups or other annoying notices.
You can quiet it down by listing your active connections withnmcli conn,
then disabling them usingnmcli conn down connection_name.
Also you could just disable NetworkManager altogether with
sudo systemctl stop NetworkManager.
Setting up a simple FTP server
For cases like these I really like uftpd which is available on Arch Linux via the AUR.
No Nonsense FTP/TFTP Server, uftpd is a UNIX daemon with sane built-in defaults. It just works.
With a simple command like this:
sudo uftpd -n -o writable -l info ~/Desktop
We have an FTP server serving files from the Desktop directory and it’s also set up to allow clients to put files on the server.
I add -l info for information-level logging.
Just make sure to allow it though your firewall!
Backing up existing images
As a safety measure it’s a good idea to backup what already works.
Modem#copy flash ftp
Then just follow along with the prompts. Example screenshot:
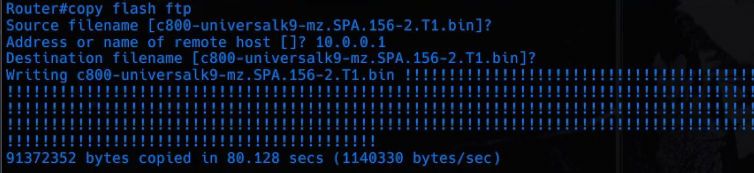
Make sure to backup all available images.
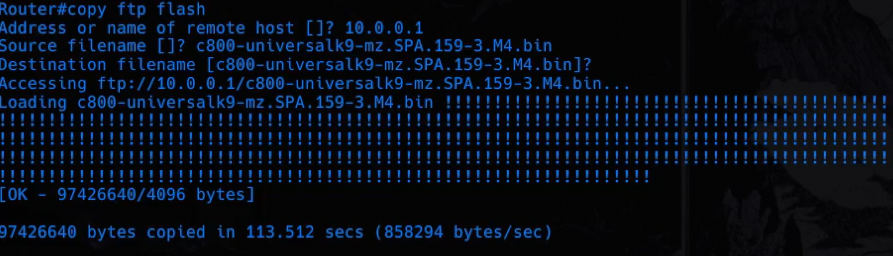
Copying and upgrading
Then just change the order like this to copy the newest files to the device:
Modem#copy ftp flash
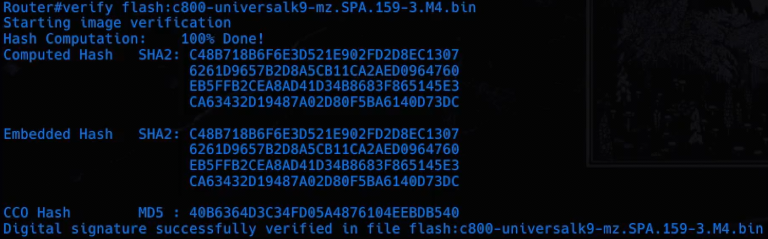
Use verify to make sure the file transferred properly.
Modem#verify flash:filename
Save any changes.
Modem#write memory
To upgrade ROMMON you need to issue a command like this:
Modem#upgrade rommon flash:filename
Although I didn’t have to do it in my case.
For IOS you just need to reboot and the system will load the latest version saved in flash.
Modem#reload
For the VDSL firmware
Modem#configure terminal
Modem(config)#controller vdsl 0
Modem(config-controller)#no shutdown
Modem(config-controller)#firmware filename flash:filename.bin
Modem(config-controller)#do write memory
Modem(config-controller)#do reload
Now, we have everything as fresh as possible, let’s proceed.
Misc and housekeeping
Before diving into the main config, it’s worth doing some light prep:
Setting system time and timezone
Since we won’t be using any NTP service we are going to set up the time manually, time drift that inevitably occurs should not impact our operations.
Modem#configure terminal
Modem(config)#clock set time_and_date
Modem(config)#clock summer-time EEST recurring last Sunday March 03:00 last Sunday October 03:00 60
Modem(config)#clock timezone EET 2 0
Modem(config)#clock update-calendar
Modem(config)#do write memory
It seems a little complicated but you can just type it out word by word and hit ? to see what you are supposed
to input. Just make sure to look up when summer-time is actually recurring in your region.
Don’t forget to clock update-calendar as the system actually keeps time in both the clock and the calendar.
Typical quality of life settings
Modem#configure terminal
Modem(config)#no ip domain lookup
Modem(config)#line console 0
Modem(config-line)#logging synchronous
Modem(config-line)#logout-warning 30
Modem(config-line)#transport output none
Modem(config-line)#do write memory
The plan is to only access the device from the console, I think it’s fair to not ask for a password/login for our scenario.
Other lines
Modem#configure terminal
Modem(config)#line vty 0 189
Modem(config-line)#transport input none
Modem(config-line)#transport output none
Modem(config)#line aux 0
Modem(config-line)#transport input none
Modem(config-line)#transport output none
Modem(config-line)#do write memory
Extra effort for no layer 3 services
Modem#configure terminal
Modem(config)#no ip source-route
Modem(config)#no ip routing
Modem(config)#no ip bootp server
Modem(config)#no ip cef
Modem(config)#no ipv6 cef
I also set up each interface with no ip address and no ip route-cache just to be explicit.
VTP, CDP, LLDP
Modem(config)# vtp mode transparent
Modem(config)# no cdp run
Modem(config)# no lldp run
IGMP snooping and save config
Finally
Modem(config)#no ip igmp snooping
is helpful for avoiding issues with our IPTV setup.
Of course don’t forget to:
Modem(config)# write memory
Main configuration
Here’s the plan:
-
Subinterfaces:
Eth0.835(VLAN 835 –> PPPoE / Internet)Eth0.836(VLAN 836 –> IPTV)Eth0.837(VLAN 837 –> VoIP)
-
SVIs: create
Vlan835,Vlan836,Vlan837 -
Bridge groups: three in total, each linking an SVI with its subinterface
-
Switchports:
Fa0→ trunk carrying VLANs 835 + 836 (Internet + IPTV)Fa1→ trunk carrying VLAN 837 only (VoIP)
-
Dead VLAN 666:
- Since the trunk ports will need to be specified with a native VLAN we will use a “dead” VLAN for security.
Here’s what it all looks like:
Current configuration : 2667 bytes
!
! Last configuration change at 15:15:03 EEST Mon Sep 13 2025
!
version 15.9
no service pad
service timestamps debug datetime msec
service timestamps log datetime msec
no service password-encryption
!
hostname Modem
!
boot-start-marker
boot-end-marker
!
!
!
no aaa new-model
memory-size iomem 10
clock timezone EET 2 0
clock summer-time EEST recurring last Sun Mar 3:00 last Sun Oct 3:00
!
!
!
!
!
!
!
no ip source-route
no ip routing
!
!
!
!
!
!
!
!
!
!


!
!
!
!
no ip bootp server
no ip domain lookup
no ip cef
no ip igmp snooping
no ipv6 cef
!
!
!
!
!
multilink bundle-name authenticated
!
!
!
!
!
!
!
license udi pid C887VA-K9 sn FCZ220940B7
!
!
vtp mode transparent
!
redundancy
!
!
!
!
!
controller VDSL 0
 firmware filename flash:VA_A_39t_B_38r1_24o_rc1_SDK_4.14L.04A.bin
!
vlan 666,835-837
no cdp run
!
!
!
!
!
!
!
bridge irb
!
!
!
!
!
interface ATM0
 no ip address
 no ip route-cache
 shutdown
 no atm ilmi-keepalive
!
interface Ethernet0
 no ip address
 no ip route-cache
!
interface Ethernet0.835
 encapsulation dot1Q 835
 no ip route-cache
 bridge-group 1
!
interface Ethernet0.836
 encapsulation dot1Q 836
 no ip route-cache
 bridge-group 2
!
interface Ethernet0.837
 encapsulation dot1Q 837
 no ip route-cache
 bridge-group 3
!
interface FastEthernet0
 switchport trunk native vlan 666
 switchport trunk allowed vlan 1,835,836,1002-1005
 switchport mode trunk
 switchport nonegotiate
 no ip address
!
interface FastEthernet1
 switchport trunk native vlan 666
 switchport trunk allowed vlan 1,837,1002-1005
 switchport mode trunk
 switchport nonegotiate
 no ip address
!
interface FastEthernet2
 no ip address
 shutdown
!
interface FastEthernet3
 no ip address
 shutdown
!
interface Vlan1
 no ip address
 no ip route-cache
 shutdown
!
interface Vlan835
 no ip address
 no ip route-cache
 bridge-group 1
!
interface Vlan836
 no ip address
 no ip route-cache
 bridge-group 2
!
interface Vlan837
 no ip address
 no ip route-cache
 bridge-group 3
!
ip forward-protocol nd
no ip http server
no ip http secure-server
!
!
!
ipv6 ioam timestamp
!
!
control-plane
!
bridge 1 protocol ieee
bridge 2 protocol ieee
bridge 3 protocol ieee
!
!
mgcp behavior rsip-range tgcp-only
mgcp behavior comedia-role none
mgcp behavior comedia-check-media-src disable
mgcp behavior comedia-sdp-force disable
!
mgcp profile default
!
!
!
!
!
!
line con 0
 logout-warning 30
 logging synchronous
 no modem enable
 transport output none
line aux 0
 transport output none
line vty 0 4
 login
 transport input none
 transport output none
line vty 5 189
 login
 transport input none
 transport output none
!
scheduler allocate 20000 1000
!
!
!
!
!
!
!
end
Don’t forget to write memory !
Next part:Building an IT Home-Lab Network | Part 3: Setting up pfSense on an Old Intel Platform